
SIMPLE NATIVITY
Written in PSP9 but should be doable in later versions:
Supplies: Nativity Scene
Star Corner Accents
Plugins: FM Blend Emboss
Simple Top Left Mirror
Star Corner Accents
Plugins: FM Blend Emboss
Simple Top Left Mirror
Supplies: HERE
Step 1: Open Nativity Scene graphic. Duplicate twice and close original. Minimize one copy.
Step 2: Set Foreground Color #bc8c5b Background Color #5d0709
Step 3: FM Tools/Blend Emboss.
Step 1: Open Nativity Scene graphic. Duplicate twice and close original. Minimize one copy.
Step 2: Set Foreground Color #bc8c5b Background Color #5d0709
Step 3: FM Tools/Blend Emboss.
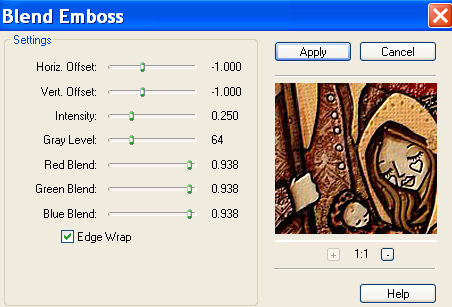
Settings: Default
Step 4: Add borders as follows:
6 pixels background
4 pixels foreground
6 pixels background/
Select All. Modify/Contract 24
Step 5: 3D Cut Out:
Step 4: Add borders as follows:
6 pixels background
4 pixels foreground
6 pixels background/
Select All. Modify/Contract 24
Step 5: 3D Cut Out:

Settings: 1/1/100/10 Black
Invert.
Blend Emboss (settings as before)
Selections None.
Step 6: Magic Wand the inner and outer 6 pixel borders (the deep red ones). Inner Bevel.
Blend Emboss (settings as before)
Selections None.
Step 6: Magic Wand the inner and outer 6 pixel borders (the deep red ones). Inner Bevel.

Settings: #2/5/4/3/0/3/White/315/50/30
Selections None.
Step 7: Add border 46 pixels foreground color. Magic Wand. Open your second copy of the graphic. Copy and paste into selection.
Effects/Reflection/Pattern:
Selections None.
Step 7: Add border 46 pixels foreground color. Magic Wand. Open your second copy of the graphic. Copy and paste into selection.
Effects/Reflection/Pattern:

Settings: 38/25/335/-94/7/4/43/66
Blend Emboss.
Selections None.
Step 8: Repeats steps #4, #5, and #6.
Step 9: Open corner accent. Apply Drop Shadow:
Blend Emboss.
Selections None.
Step 8: Repeats steps #4, #5, and #6.
Step 9: Open corner accent. Apply Drop Shadow:

Settings: 1/1/35/4 color Foreground. Copy and paste as a new layer. Move to top left corner. Simple Top Left Mirror.
Add New Raster Layer and apply your watermark. Layers Merge/Flatten.
Add text, if you so desire; a Christmas message or your name for a tag.
Resize, if you wish. Jpeg.
Background for stat:
Step 1: New image 300 X 300 pixels 200 dpi Opacity 40%
Flood fill with copy of Nativity Scene graphic.
Layers Merge Flatten.
Step 2: New Raster Layer Opacity 25%
Flood fill with background color.
Layers Merge Flatten.
Reduce size to 200 X 200 pixels.
FM Blend Emboss.
Seamless Tiling Default Settings.
Jpeg.
Assemble in Letter Creator.
This tutorial was written and designed by jeanne and is made using teaching and tips gained from the web and PSP, Animation Shop, and the other programs used, the programs listed Help feature. Any resemblance to other tutorials available is coincidental. Please do not share this tutorial or to place it on any web site without my permission:
justjeanne1949@comcast.net
justjeanne1949@comcast.net
